Concord Grape Jelly

It’s almost Concord Grape season in our area.  I had one quart and one pint of homemade grape juice that we canned in 2015 left in the cellar.  Last night was the perfect night to process it into some beautiful, sweet grape jelly.

You can see how we process our jelly on an older post here:  Concord Grape Jelly

Pie Crust

13567235_1731221093758505_1047181180792873465_n

Pie crust is one of the easiest things to make that many people think is not. I like making our crusts for everything from pies to pot pies. I know exactly what is in it and there are no preservatives or chemicals!

Seeing as I have 6 cherry pies to make and freeze I will share my pie crust recipe here:

2 cups all-purpose flour
1 teaspoon salt
3 TBSP sugar (if making for fruit pies omit for meat potpies)
2/3 cup plus 2 tablespoons shortening (if you buy the vegetable shortening sticks it’s 3/4 of the stick)
4 – 6 tablespoons cold water (I usually only need 4 full TBSP)

Make crust:

In medium bowl, mix 2 cups flour, sugar and the salt. Cut in shortening, using pastry blender (or pulling 2 table knives through ingredients in opposite directions), until particles are size of small peas (crumbs). Add cold water, 1 tablespoon at a time, tossing with fork until all flour is moistened and sticks together when pressed.
Gather dough into a ball. Divide in half; shape into 2 flattened rounds about 1/2 inch thick. Wrap in plastic wrap; refrigerate about 45 minutes or until dough is firm and cold. This allows the shortening to become slightly firm, which helps make the baked pastry more flaky. If refrigerated longer or you have frozen it, let pastry soften slightly before rolling.
With floured rolling pin, roll one round into round 2 inches larger than upside-down 9-inch glass pie plate. Place in pie plate and ease into plate, pressing firmly against bottom and side. You can do the same with the other half for a topped pie or roll and cut it into strips for a lattice crust.

I make 2 batches of crusts and keep them in the freezer as they are perfect to pull out and let soften when you need them.

I also freeze our pies unbaked after assembling them. You heat them just as you would a frozen pie at 375 covering the crust edge after 20 minutes and continue until the crust is browned and the filling is bubbly.

Our family Cherry Pie recipe here:
https://chasenchanceranch.wordpress.com/…/cherry-pitter-be…/

Cherry Season!!

7315

It’s cherry season here. It’s a little early and unfortunately the cherries are splitting because of all the rain we have had.  But we were able to take the kids and get a good few bucket fulls of sweet beautiful cherries.

I process our cherries 3 ways to have throughout the year:

1) Canning them

2) Flash freezing

3) Cherry Pies stored in the freezer (these are just like store bought, you pull them out and bake them when ready)

IMG_2846 IMG_2847 IMG_2848

You can see our recipes (and the awesome technique for pitting) on our Facebook page here:  Cherry Season

Cranberry Sauce

sauce 4

In our area you can buy fresh cranberries between October and December and then they are very hard to get.  The stores have great sales on them so I always try to grab them and make our supply of cranberry sauce and can it for the year.  I also froze 6 bags so I will be able to utilize fresh cranberries when we need them (especially since my son saw the batch of cranberry sauce I made today and said “mom that won’t last until Christmas”).  He LOVES the stuff.

I made it today using my recipe at the bottom of the post.  I made a double batch so you would need to double the recipe if you are making a double batch also.  I find it best to only double the batch and make multiple batches if you want more than 6 jars as it sets up better.  I will make another double batch next week to can.

start sauce2 popping

First wash cranberries.

In a pot add 1 cup of water per 12 oz bag and 3/4 cups sugar and bring to a boil.

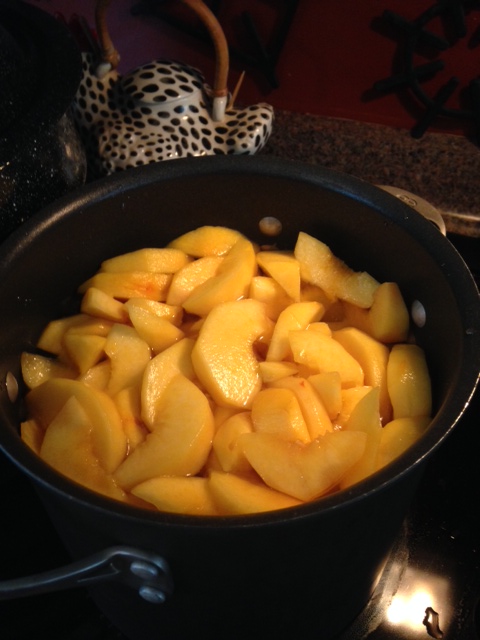
Place cranberries in boiling sugar water and boil gently for 10 minutes (they will start to pop and foam and look like this picture).

sauce3 boil

After 10 minutes take the hot cranberries and pour them through a fine strainer or use a food mill to separate.  I have done both and there are not lumps or pieces of fruit in the sauce after you strain it.

mill  Today I used the food mill.

Once you have it separated you can do:

1) if storing in the fridge, pour into the containers, let cool and then place in the fridge for up to 10 days.

2) if canning it get the jars prepared and water bath

THIS IS FOR CANNING:

Take the strained juice and place it back into the rinsed out stock pot.  Bring to a boil and add 1/2 bag pectin (1.75 oz box) or 3 heaping tablespoons.  Boil for approximately 1 minute.

20142

Ladle into hot prepared jars and put them in the water bath.  Once the water is boiling again, time it for 15 minutes with the lid on and boil gently.  After 15 minutes turn the heat off, remove the lid and let them sit for 5 more minutes.  Remove and place on a towel or wire rack and let sit for 24 hours before moving.

2014

This was a double batch


Store in a cool dark place for up to a year.

As a tip when we are going to eat one I pull it out and put it in the fridge for a few hours so it’s chilled!!

CRANBERRY SAUCE RECIPE (for 12 oz bag)

12 oz bag cranberries rinsed

1 cup water

3/4 cup sugar

pectin (if canning)

Bring water and sugar to a boil.  Add cranberries and boil gently for 10 minutes stirring frequently.

Remove from heat and pour into a bowl with a fine mesh strainer or use a food mill to separate skins and stems.

IF REFRIGERATING — place in jars or container and let cool.  Cover and store in fridge for up to 10 days.

IF CANNING — have water bath boiling and jars/lids hot

Place the strained cranberry sauce back in the rinsed out stock pot and bring to gentle boil.

Add the pectin and boil for 1 minute stirring frequently.

Remove from heat and ladle into hot jars and cover with lids and screw bands until tight

Place in the water bath and bring to a boil and boil gently for 15 minutes.

Turn heat off, remove cover and let them sit for 5 more minutes.

Remover from canner and place on dish towel or wire rack and let sit for 24 hours before moving them.

Store in cool dark place for up to a year.

IF YOU WANT TO FREEZE YOUR CRANBERRIES YOU DO IT THE SAME WAY AS I HAVE SHARED FOR OTHER FRUITS SUCH AS PEACHES.  DIRECTIONS HERE:  Flash Freezing Fruit

Canning Peaches

batch2 batch1

Peach season is in full swing in our location and the time to can or make jam, preserves, or jelly is right now!!!  You should also freeze some slices to make a fresh peach cobbler or use in smoothies.  You can see how to flash freeze peaches here.

I canned 17 jars of peaches in various size jars last week.  As always I make the most for our family, a few as gifts, and a few to sell.  (step by step pictures at the bottom of post)

Last week at our camp out my son and his friend wanted to catch fireflies.  We were all back at the campsite and he asked me where the mason jars were to use for the bugs.  I told him exactly where they were.  So off the boys went to get a jar.  When they returned they informed me they did not see any empty jars only the peaches so they opened one, ate the whole jar, and now had their empty jar!! UGH…can we at least save a few for winter please!!!

Here is my method for canning our peaches.  If you do not know how to can, you can google it or follow instructions I posted on another blog here:  Canning procedures

I use a hot pack method with my peaches as I believe it helps to retain their color while stored.

Prepare a large bowl with water and 1/4 cup lemon juice.

You will need 8 cups of water and 4 cups of sugar

25 peaches or more

Slice your peaches all the way around and twist the top off (see procedure at the bottom of this page)

Peel your peaches (I have been told to blanch them, however I have never found it to work for me and I like my peaches more on the firm side rather than ripe with soft skins).

Peel one peach at a time and slice or cut into chunks and place in lemon water to keep the beautiful yellow color.

Once the peaches are all sliced and in the lemon water take a stock pot and fill it with 8 cups of water and slowly add 4 cups of sugar stirring constantly until the sugar is dissolved.  Bring it to a full boil.  (you can use more or less sugar if you would like.  I find the half/half method good for fruit that is a bit more firm)

Using a slotted spoon add the peaches to the boiling syrup and bring to a light simmer for 6 minutes (time after you place the last peaches in the pot).

Get your prepared jars and fill each jar to the rim with peaches again using a slotted spoon.

Use a ladle and fill the jar with syrup to 1/4 inch from the top. (the peaches may float up just gently pat them down with the back of a spoon).

Using a plastic knife carefully slide it around the jar to help the peaches settle.

Wipe the rim of the jar with a wet papertowel.

Put on the hot lid and the screw cap until just tight.

Fill all the jars and then process them in the hot water bath once the water comes back to a boil for 25 minutes.

Remove and let cool.  Once cooled, test the top by pressing gently to make sure that it is sealed.

I know this looks like a lot of work but the hardest part is peeling all the peaches.  The rest is very simple.

photo 2-2photo 1-1slice2twisttwist2pit remove pit slicepeachessugar waterhot packphoto 2-1batch2

This is a great way to enjoy fresh summer fruit during the winter months!!  Please do not hesitate to ask questions if you have them!!

Peaches

batch2

This is our 2nd batch of peaches.  Sometimes it’s very busy trying to fit in the old traditions with today’s world and conveniences.  It’s just as easy to stop at a store and buy your peaches, but there is a feeling that goes along with knowing you had the only hand in making your own things.  That is something you CAN’T buy.

Last night at 9:30 p.m.  I hot processed and canned our last batch of peaches.  It was the night before our first day of school, we also had a duck brought to our home earlier in the evening as it was stranded as a baby and we will nuture it until it’s old enough to fly off.  There were barn chores, hockey practice, dinner to be cooked, and I worked until 4:00.  So it was a full packed evening but when we open that jar of peaches during the winter, it will make it ALL worth while!!

batch1

First batch of peaches we canned

I will share my canning procedure in a different post soon!!

Smoothies

smoothie

Smoothies are a great way to sneak certain vegetables, vitamins and minerals into your diet as well as your children.  I made one the other day for us with Kale, Strawberries, Orange Juice, honey and ice cubes.  The kids had no idea what was in it and they drank it right down. 

Here is how I made it:

5 Strawberries washed and dehulled

6 chopped small kale leaves

1 Tablespoon honey

1/4 cup orange juice

5 ice cubes

Put all in the blender and blend until smooth.  Great flavor and I snuck in those extra greens!!


Flash Freezing Peaches

flash freeze

Flash frozen and ready to store in the freezer

It is peach season and they are so sweet and juicy right now the whole house smells wonderful from them.

I had bought a bushel on Thursday to can on Sunday.  The bushel had 31 peaches in it.  My children at 12 of them!!  YES 12!!!  So we had to run to the farmers market again on Saturday to get another bushel.

The farmers market is a great place to get low priced fresh vegetables and fruits.  There is a stand that sells cakes and of course the tween begged me to get a pound cake to try.  We are driving in the car and this is what I see:

photo 3-1

She unwraps and bites the pound cake like a cookie and the boy in the back seat has somehow reached into the back and gotten himself a peach!!!

So guess no one else is going to eat that cake and if there is traffic I am going to have to head back to the market as the boy will surely get himself another 2, 3 or 5 peaches before we make it back over the bridge home!!

So I salvaged 27 peaches out of the bushels from Saturday until Sunday morning when I canned 9 jars (will put those in another post) and I flash froze 2 gallon size bags to use for peach cobbler, smoothies, and frozen treats later in the year. 

You can’t find a good peach in our area after October and by December they are not even in the stores.  It’s a wonderful feeling to pop open a can and have some of that summer goodness during a winter storm or relaxing by a cozy fire.  My children love them right out of the freezer bag letting them thaw just slightly.

Flash freezing helps to ensure your fruit will not stick together and become a big clumpy mess in the freezer.  You can pull out one peach or ten as they will stay individual.

lemon

lemon water

ready to freeze

laid out ready to freeze

flash

four hours fully frozen

Here is how I flash freeze the peaches:

Peel the peach and cut into slices (TIP on how to peel and slice peaches below)

Put the slices into a bowl of water with 1/4 cup of lemon juice (should be a large bowl).

Keep the sliced peaches in the lemon water until you are done slicing as many as you are going to freeze.  The lemon water will keep the peaches their beautiful yellowy red color and not let them brown.

Once they are all sliced line a cookie sheet with a heavy duty paper towel (I use Viva or Brawny as they hold up better).

Using a slotted spoon or your hand remove the peaches and lay them on the cookie sheet not touching eachother. 

Once they are all on the cookies sheets use another paper towel to pat them dry.

Place them in the freezer or at least 4 hours.

Remove them and they should be frozen through.  Remove them from the paper towel and place into a gallon freezer bag and store in the freezer for up to 8 months. 

TIP FOR PEELING PEACHES

slice2

Slice the peach all the way around the middle

twist

hold each end and twist until the top pops off

twist2

top has no pit, bottom as pit.  Peel them both

pit

use knife to cut pit out

remove pit

will look like this

slice

Slice into size you want

Summer sweets all year long!!

Storing Berries (Flash freezing & Refrigerator storage)

When any berries or fruits are in season it’s a scramble to get them at the best possible price for two reasons. First because they are wonderful to eat/snack/cook with after a long winter and second because you can freeze or can them so you have wonderful fresh natural fruit for the whole year!!

Our local grocery store had buy 2 pints of blueberries and get 3 free. That is 5 pints for the price of 2!!!! Of course I bought 10 as that will hold us through the year with pies and frozen berries for yogurt, oatmeal, pancakes, smoothies, and blueberry syrup for ice cream.

Here is what I do with our berries to keep them as fresh as possible in the refrigerator and how I store them for the winter in the freezer:

FLASH FREEZING: Wash the berries and remove all stems. Pat them dry with papertowels or a non lint dish cloth. Lay them on a cookie sheet and let them air dry so they are not wet. Once dry place in the freezer for 30 minutes. Remove them and store them in freezer bags. They will not stick together so you can grab as few or as may as you will need and will be perfectly sweet when you remove them to use.

TO KEEP IN THE REFRIGERATOR:: Place the berries in a large bowl with a teaspoon of white vinegar and cover with water (you do not have to remove stems unless you want to). Let sit for about 4 minutes. Rinse thoroughly and pat dry. Place them in an airtight container laying them flat on a papertowel. Use a papertowel in between each layer. Place top on. These should hold your berries in the fridge much longer than if you just place them in there in the containers they came in.